blog
.avif)
How to Make Your Christmas Lights Look Even and Professional From the Street
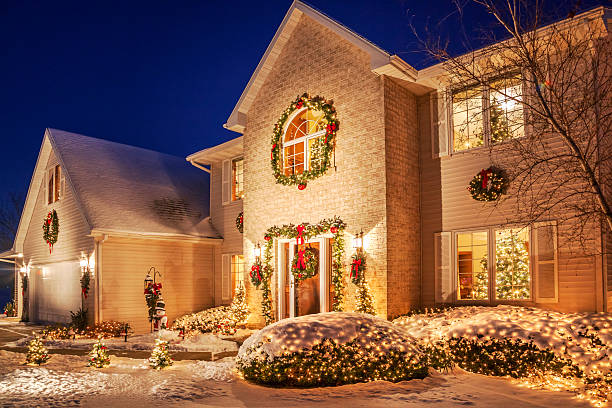
There's a specific quality that distinguishes a professionally installed Christmas light display from a DIY effort when viewed from the street, and most homeowners can see it immediately even if they can't precisely articulate what makes the difference. The professional display looks intentional, even, and polished. The DIY display looks slightly uneven, inconsistent, or haphazard in ways that are hard to pinpoint but immediately noticeable. Understanding what actually creates that difference helps you either achieve better DIY results or understand exactly what you're getting from professional installation.
The Visual Elements That Create a Professional Appearance
Even Spacing Between Lights Throughout the Display
The most immediately noticeable quality difference between professional and DIY holiday lighting is spacing consistency. Professional installation maintains precise, even spacing between individual lights and between light strings along the entire roofline, creating a uniform rhythm of light that reads as intentional and planned from the street.
DIY installations almost always show spacing inconsistencies: sections where lights are slightly closer together, gaps where a string ran slightly short or was pulled tighter than others, and areas where the transition between strings created a subtle gap or overlap that breaks the rhythm. These inconsistencies are individually small but collectively create the slightly uneven appearance that's the most reliable visual indicator of a DIY installation.
Straight, Consistent Lines Along the Roofline
A professional roofline display follows the roofline geometry with consistent, clean lines that track the architectural elements of the home precisely. The lights follow the fascia line uniformly, maintaining the same height and angle throughout rather than dipping in certain sections or pulling away from the roofline in others.
DIY installations frequently show dips, waves, and height variations along the roofline that result from uneven tension in the string, inconsistent clip placement, and the natural difficulty of maintaining precise positioning while working from a ladder without a clear sightline to how the display looks from street level.
Clean Corners and Transitions
Every point where a light string turns a corner, transitions between different architectural elements, or makes a directional change represents a technical challenge for the installer. Professional installers handle these transitions cleanly, with consistent treatment that maintains the display's visual rhythm through each corner and directional change. DIY installations frequently show the corners and transitions most clearly, where bunching, gaps, or directional inconsistencies are most concentrated.
What Actually Creates Even, Professional Results
Planning From Street Level Before Installing Anything
One of the most important differences in approach between professional and DIY installation is the planning phase. Professional installers visualize and plan the display from street level before a single clip goes up, understanding that the installation vantage point (from a ladder looking at the roofline from close range) is completely different from the viewing vantage point (from the street looking at the roofline from a distance).
Decisions that look fine from a ladder two feet away from the roofline can look obviously uneven from thirty feet away on the street, and planning the display with the street-level view as the primary reference rather than the close-up installation view is what allows professional installers to create displays that look as intended from the angle that actually matters.
Measuring and Marking Before Clipping
Professional installation involves measuring roofline sections and calculating clip spacing before beginning to place clips, ensuring that the spacing is geometrically consistent from the start rather than estimated by eye during installation. This pre-measurement step is what creates the even spacing rhythm that distinguishes professional results, and it's the step that DIY installations most commonly skip in favor of eyeballing that produces the inconsistencies visible from the street.
Commercial-Grade Clips That Maintain Consistent Height
The clips used in professional installation hold lights at a consistent, precise height relative to the fascia throughout the entire display, maintaining the clean line that creates the professional appearance. Consumer clip products available at retail stores produce more variable results, allowing individual strings to sit at slightly different heights and angles that accumulate into visible inconsistencies across a full roofline display.
A Helper on the Ground for Real-Time Feedback
Professional installation crews include at least one person on the ground whose specific role includes providing real-time feedback on how the display looks from street level during installation. This ground-level perspective during the installation process catches inconsistencies while they're easy to correct rather than after the full display is complete and correcting them requires substantial rework.
DIY installation almost always happens without this real-time ground-level feedback, since most homeowners are on the ladder doing the installation themselves with no one providing systematic street-level observation during the process.
The Specific Problems Most Common in DIY Displays
The Saggy Middle
The most common DIY display problem is sagging in the middle sections of long roofline runs, where the string weight pulls the lights down between clip points. This produces the characteristic wave pattern where lights are at the correct height near clips but sag noticeably between them, particularly visible on long spans between anchor points.
The Mismatched Brightness Problem
DIY displays assembled from multiple consumer light strings purchased at different times, or from different manufacturers, frequently show subtle brightness or color temperature mismatches between strings that are placed adjacent to each other. From the street, these mismatches appear as sections of the display that look slightly different from neighboring sections, breaking the visual uniformity that a professional display maintains throughout.
The Abrupt Ending
DIY displays frequently end abruptly where the installer ran out of lights or reached the limit of accessible roofline, creating a display that looks complete in some sections and simply stops in others without the planned, intentional ending that a professional design provides.

What Professional Installation Delivers That DIY Cannot
Professional installation combines pre-measured planning, consistent commercial-grade hardware, real-time ground-level feedback during installation, and the experience of having installed dozens of displays across a range of home architectures into a result that looks the way holiday displays look in the reference images homeowners use when envisioning their own display.
The evenness, the clean lines, the consistent brightness, and the intentional overall design that make a professional display look the way it does from the street are not happy accidents. They're the result of the specific practices described above, applied consistently across every element of the installation by people who do this work professionally and know exactly how each decision looks from the street.
Schedule your Christmas light installation consultation today.

Detail You Can See. Quality You Can Trust.
Contact Us


Find us on


